
16 Braided Mohawk Hairstyles for Black Hair That Are Stunning, Bold, and Totally Wearable
If you’ve been searching for braided mohawk hairstyles for black hair, you’ve landed in the right place. I’ve spent serious time researching these styles — from classic cornrow mohawks to intricate feed-in designs — so you get the most accurate, useful breakdown possible.
So what are braided mohawk hairstyles for black hair? Braided mohawk hairstyles for black hair are protective styles that use braids — typically cornrows — to create a raised central strip of hair or height down the center of the head, while the sides are braided flat or shaved. They range from simple two-braid center strips to complex sculptural designs with twists, curls, box braids, or added hair extensions.
Keep reading — I break down all 16 styles in detail, including which face shapes they flatter, how long they last, styling tips, common mistakes, and a complete hair care guide so your braids stay fresh as long as possible.
Why Braided Mohawks Work So Well for Black Hair
Honestly? This style was made for us. Braided mohawks combine structure with flair, and Black hair textures — from 3C coils to 4C kinks — hold these styles better and longer than most other hair types. The natural grip of textured hair keeps braids tight, the density supports sculptural shapes, and the versatility of extensions means you can go from a sleek cornrow mohawk to a voluminous curly fro-hawk in the same appointment. These styles also double as protective styles, tucking away your ends and reducing daily manipulation. That’s the whole package right there.
1. Classic Cornrow Mohawk
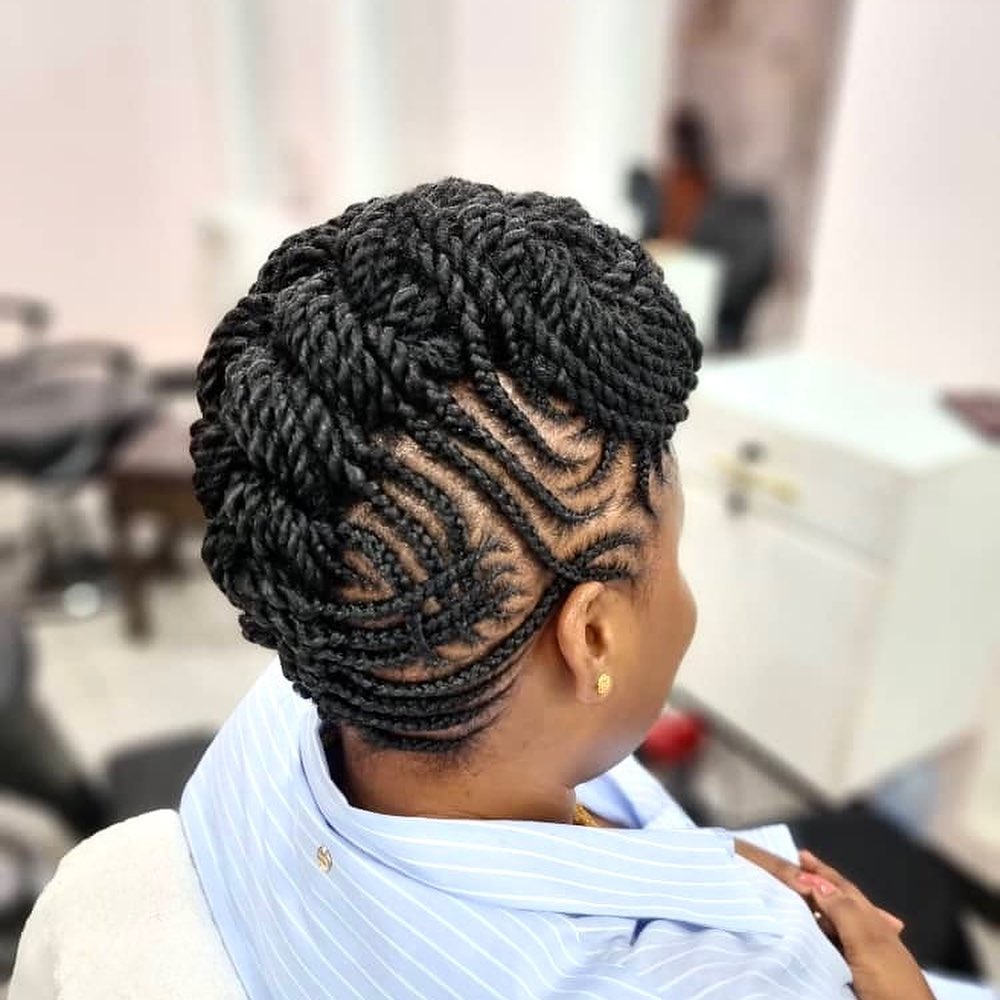
Source: @Instagram
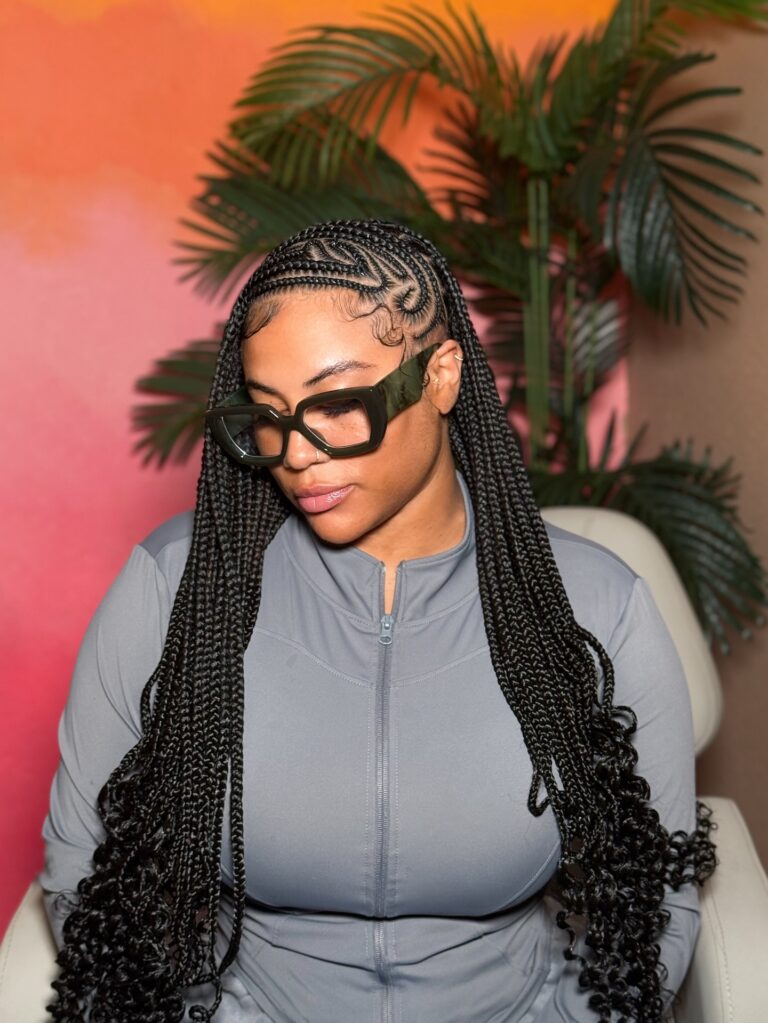
This is where most people start — and it’s a classic for a reason. The cornrows mohawk features two or three cornrow braids running along each side of the head, with the center section left loose, picked out into an afro strip, or gathered into a puff. It’s clean, bold, and takes a skilled braider about 1–2 hours to complete. The contrast between the flat, directional cornrows on the sides and the lifted center section is what makes this style so visually striking. It works beautifully on oval, heart, and square face shapes, as the height adds length to the overall silhouette. Perfect for both casual and more formal settings, this is the mohawk style most people picture — and it delivers every time.
Best for: All face shapes, type 3C–4C hair
Lasts: 2–4 weeks
Tip: Ask your braider to braid the sides in a slightly curved direction (toward the center) for a more sculpted, intentional look
2. Feed In Cornrow Mohawk
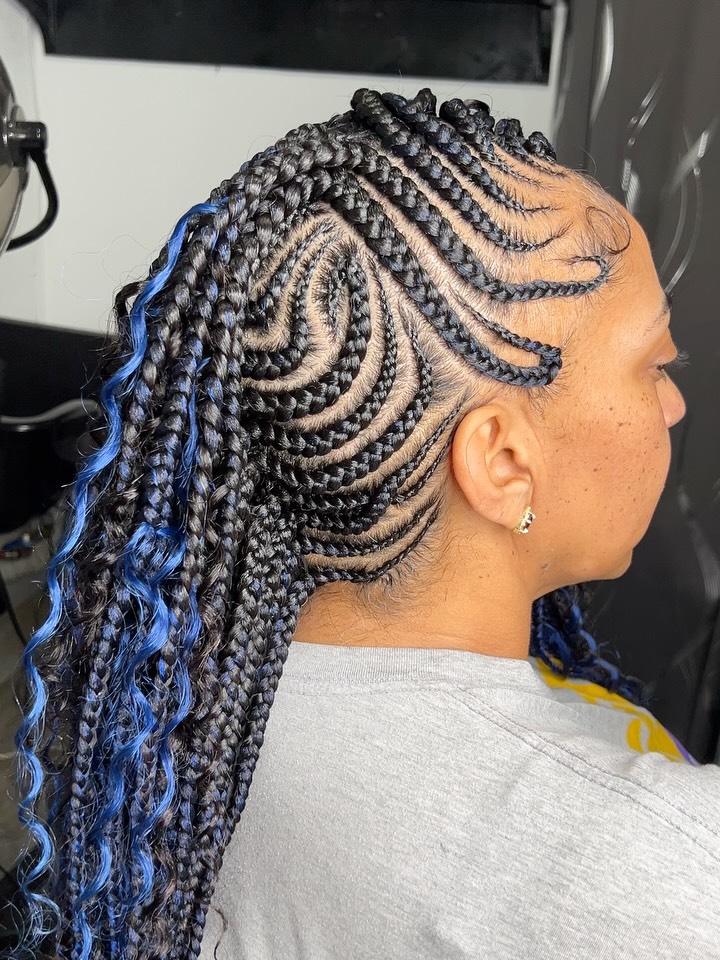
Source: @Instagram
The feed-in technique takes the cornrow mohawk to the next level. Instead of adding all the extension hair at the root (which can cause tension and bulk), the braider gradually incorporates small amounts of hair as they braid down the scalp. The result is a thinner, flatter braid that looks incredibly natural and sits flush against the head without that puffy root you sometimes see. Feed-in cornrow mohawks are especially good for edges — there’s less pulling at the hairline, which protects your most fragile strands. The finished style has an almost geometric precision that looks genuinely professional. I always recommend this technique for anyone with a sensitive scalp or fine edges.
Best for: Fine edges, sensitive scalps, all hair types
Lasts: 3–5 weeks
Tip: Keep the side cornrows close together for a sleeker finish; wider-spaced braids look less polished on this style
3. Faux Hawk with Box Braids
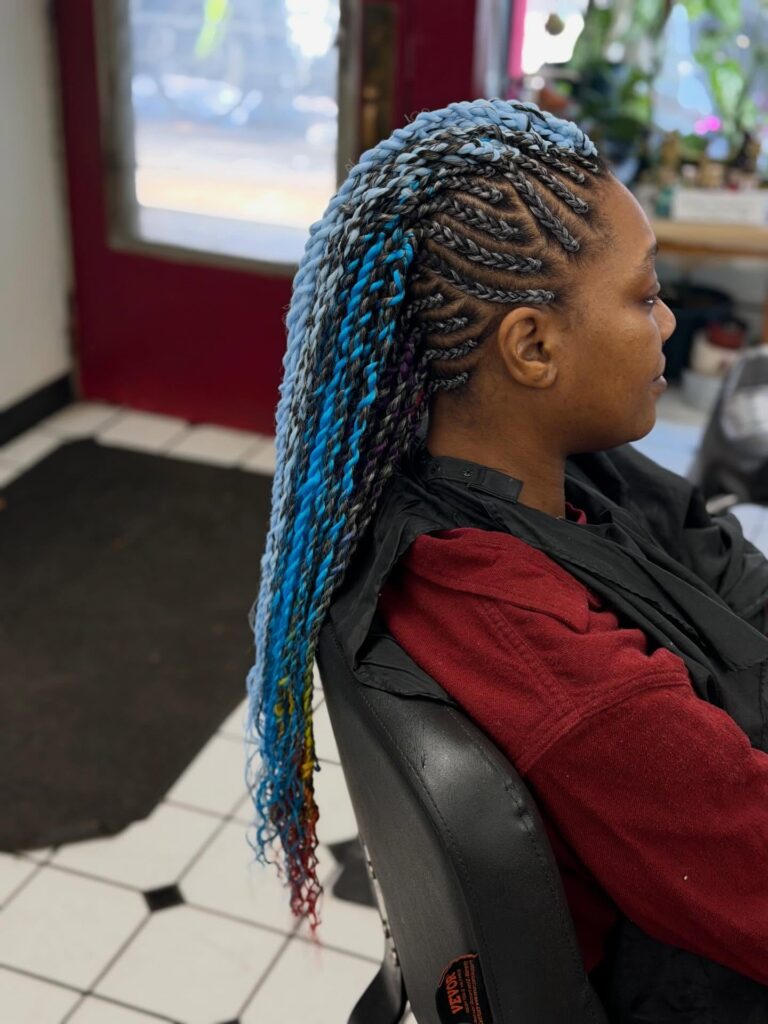
Source: @Instagram
Imagine the boldness of a mohawk combined with the statement-making volume of box braids. This style sweeps box-braided sections from the sides upward and toward the center, where they’re gathered or pinned to create a raised, full center strip. The box braids can be left loose for movement or stacked for a more architectural look. It’s one of the most creative expressions of the braided mohawk concept and photographs absolutely beautifully. Longer box braids give you the option to let the center fall backward dramatically, while shorter ones create a tight, defined crest. This style suits oval and oblong face shapes especially well.
Best for: Oval, oblong face shapes; medium to long box braids
Lasts: 4–6 weeks
Tip: Add gold rings or beads to the center braids to amplify the drama
4. Knotless Braid Mohawk
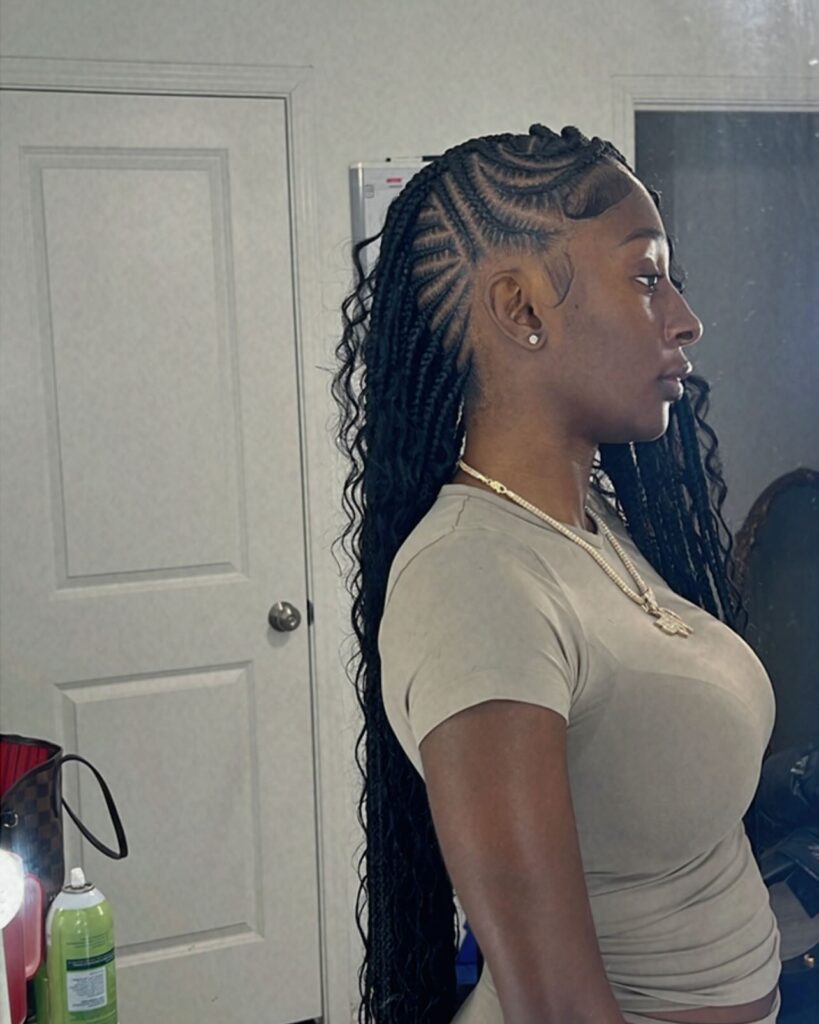
Source: @Instagram
Knotless braids have changed the protective style game entirely. Unlike traditional box braids that start with a knot at the root (which creates tension and can cause breakage), knotless braids begin with your natural hair and gradually incorporate extensions. A knotless braid mohawk applies this gentler technique to the mohawk shape — the result is a style with incredible definition and virtually zero scalp soreness after installation. The braids lie flatter and look more natural. If you’ve avoided mohawk styles in the past because of scalp pain, a knotless version is your answer. They’re also significantly lighter in weight, which means less stress on the hair follicle over the wearing period.
Best for: Scalp-sensitive individuals, first-time mohawk wearers
Lasts: 4–6 weeks
Tip: Opt for smaller knotless braids on the center strip for a more refined, high-fashion finish
5. Curly Fro-Hawk

Source: @Instagram
The curly fro-hawk is pure joy. The sides are laid flat with cornrows or smooth twists while the center section bursts into a full, natural afro strip or a cluster of defined curls (either natural or achieved with crochet hair). The visual contrast between the controlled, flat sides and the voluminous center is breathtaking. This style works especially well for women with type 4A–4C hair who have enough density to create real height in the center. You can keep the curly section short and tight for a more structured look, or let it grow upward and outward for full-on runway energy. Add a headband or gold cuffs for finishing flair.
Best for: Type 4A–4C hair, oval and heart-shaped faces
Lasts: 2–3 weeks (natural hair center needs refreshing more frequently)
Tip: Use a curl defining cream and diffuse the center section to maximize definition and hold
6. Braided Mohawk with Shaved Sides
Source: @Instagram
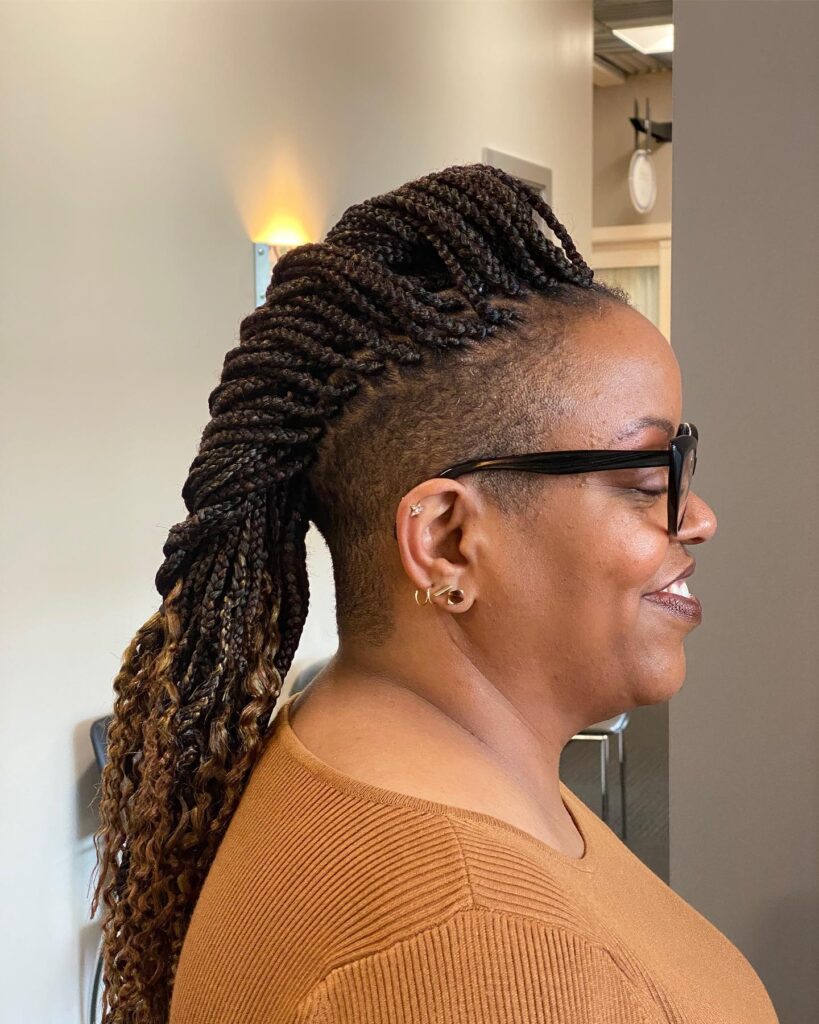
For the bold ones. Shaving the sides completely and replacing the flat cornrows with a clean fade or design creates the most dramatic version of the braided mohawk. The braids or twists running down the center pop even more dramatically against the bare skin on either side. This look is incredibly striking and works best for those who are fully committed — unlike cornrowed sides, you can’t simply undo a shave. However, the clean lines between the shaved sides and the center braids create a sculptural precision that no other variation achieves. Barbershop precision combined with a braider’s artistry — this is the ultimate collaboration style.
Best for: All face shapes, those who love high-contrast styles
Lasts: 4–6 weeks (braids); sides need a trim every 2–3 weeks
Tip: Ask the barber to add a design — a lightning bolt, star, or geometric line — to the shaved side for extra personality
7. Twist Out Mohawk
Source: @Instagram
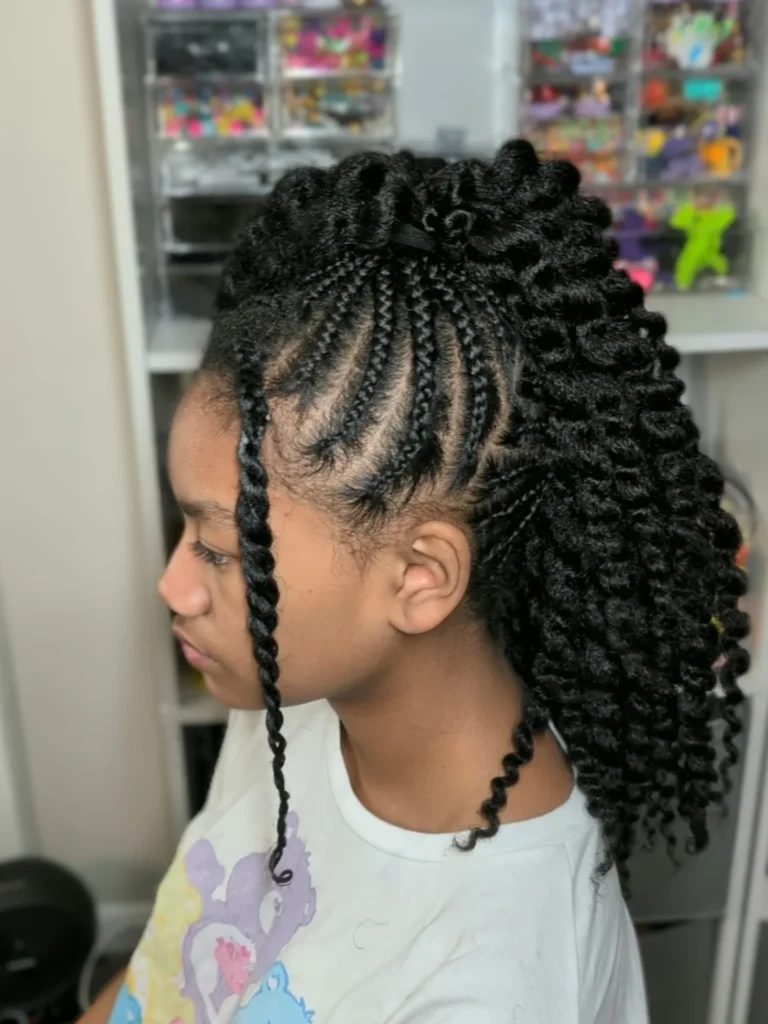
This style is all about texture. The sides are cornrowed flat while the center section is styled using a two-strand twist-out technique — where hair is twisted while damp, allowed to dry completely, then unraveled into a defined, voluminous coil pattern. The twist-out center gives the mohawk a softer, more natural feel compared to braided extensions, and the coil definition is absolutely gorgeous on type 3C–4C hair. It’s a great option for moms or anyone who prefers a style that uses their natural hair rather than extensions. Refresh the twist-out section every 2–3 days to maintain definition and softness.
Best for: Natural hair, type 3C–4C, oval and round face shapes
Lasts: 1–2 weeks
Tip: Sleep with the center section pineappled under a satin bonnet to preserve the twist-out pattern overnight
8. Goddess Braid Mohawk

Source: @Instagram
Goddess braids are larger, chunkier, and more dramatic than regular cornrows — and when used in a mohawk formation, the effect is regal. Two or three thick goddess braids run down the center of the head, raised and sculptural, while the sides are flat and smooth. This style has serious energy — it’s been spotted on red carpets, runways, and editorial shoots. Goddess braids also hold up longer than smaller braids, making them a practical choice for busy lifestyles. The larger braid size means installation is faster too — typically 1–2 hours total. Pair with bold earrings and a clean edge to let the braids be the true centerpiece.
Best for: Oval, oblong, and heart-shaped faces
Lasts: 3–4 weeks
Tip: Ask your braider to incorporate gold threading or colored extension hair into the goddess braids for a modern editorial twist
9. Braided Mohawk with Beads
Source: @Instagram
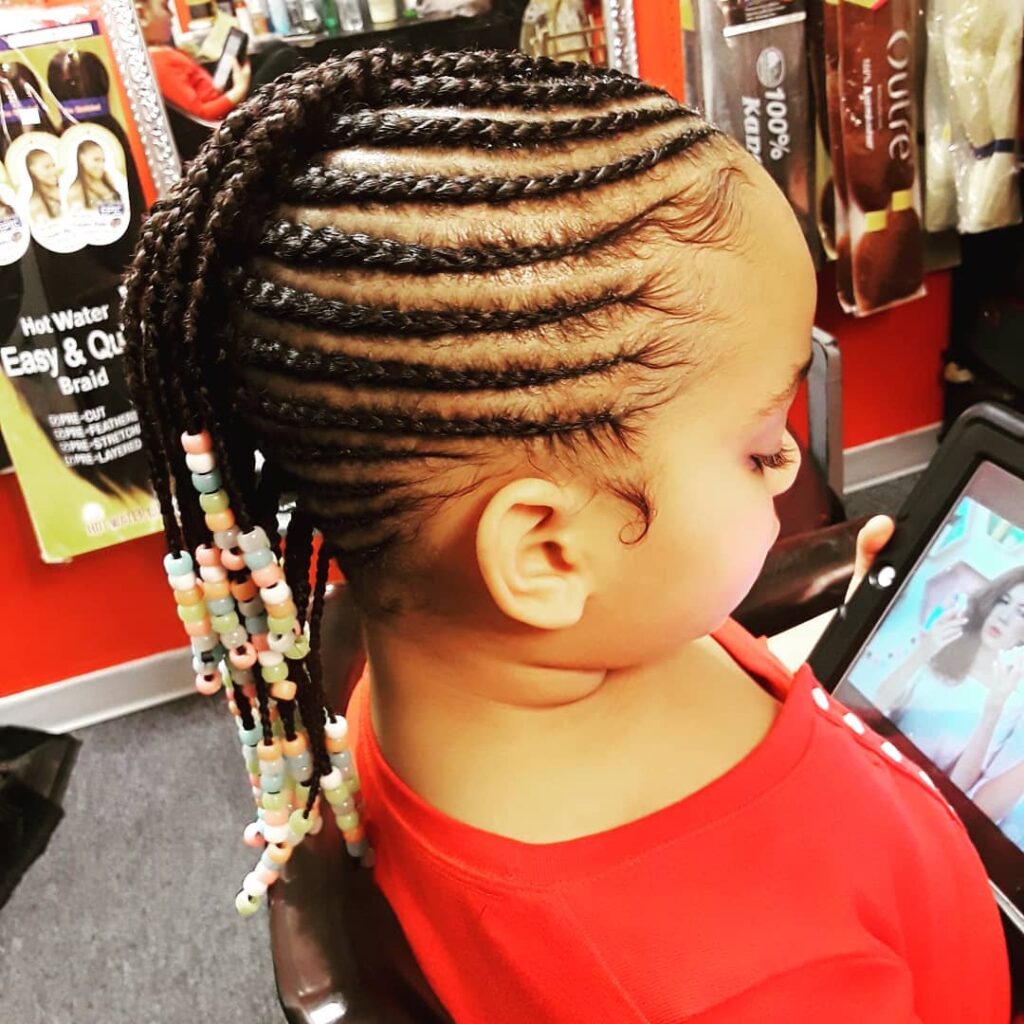
Beads have been a part of African hair traditions for centuries — and they belong on your mohawk. A cornrow or box braid mohawk with wooden beads, metallic cuffs, or colored plastic beads threaded throughout the center braids takes the style from great to genuinely unforgettable. Beyond aesthetics, beads add weight to the ends of braids, which can actually help them hang more beautifully and prevent frizzing at the tips. Children’s styles frequently use this technique, but adult versions with gold and brass cuffs or semi-precious stone beads are incredibly sophisticated. This is also a culturally meaningful styling choice that honors Black hair heritage.
Best for: All ages, all face shapes
Lasts: As long as the braids hold
Tip: Mix bead sizes for a curated, layered look — use larger cuffs near the root and smaller beads near the tips
10. Jumbo Braid Mohawk
Source: @Instagram
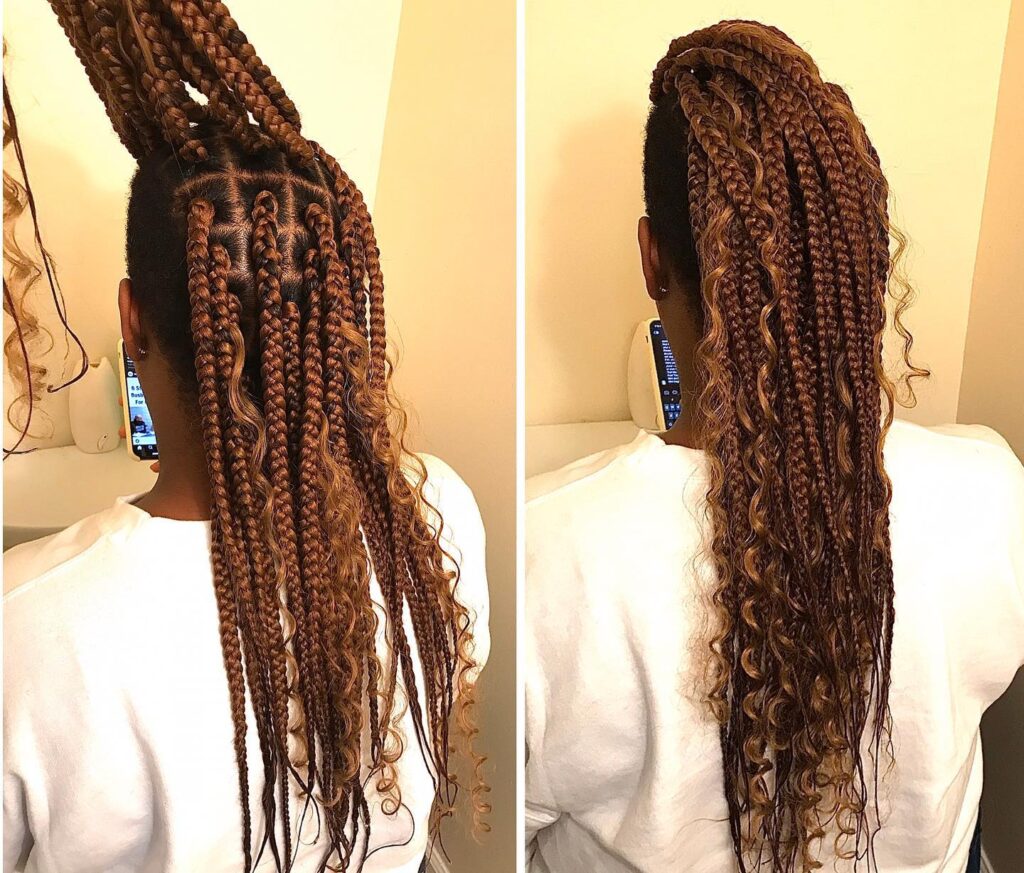
Go big or go home. Jumbo braids use thick sections of extension hair to create bold, oversized braids that make an immediate statement. A jumbo braid mohawk uses three to five of these wide braids running down the center of the head — less geometric than smaller braids but far more impactful in terms of sheer visual weight. The look is dramatic, fast to install (usually under an hour), and works especially well for special events, photoshoots, or any occasion where you want to walk into the room and stop the conversation. Keep jewelry minimal since the braids themselves are doing plenty of heavy lifting.
Best for: Oval, square, and oblong faces
Lasts: 2–3 weeks
Tip: Use jumbo knotless technique if your scalp is sensitive to the weight of traditional jumbo braids
11. Lemonade Inspired Braided Mohawk
Source: @Instagram
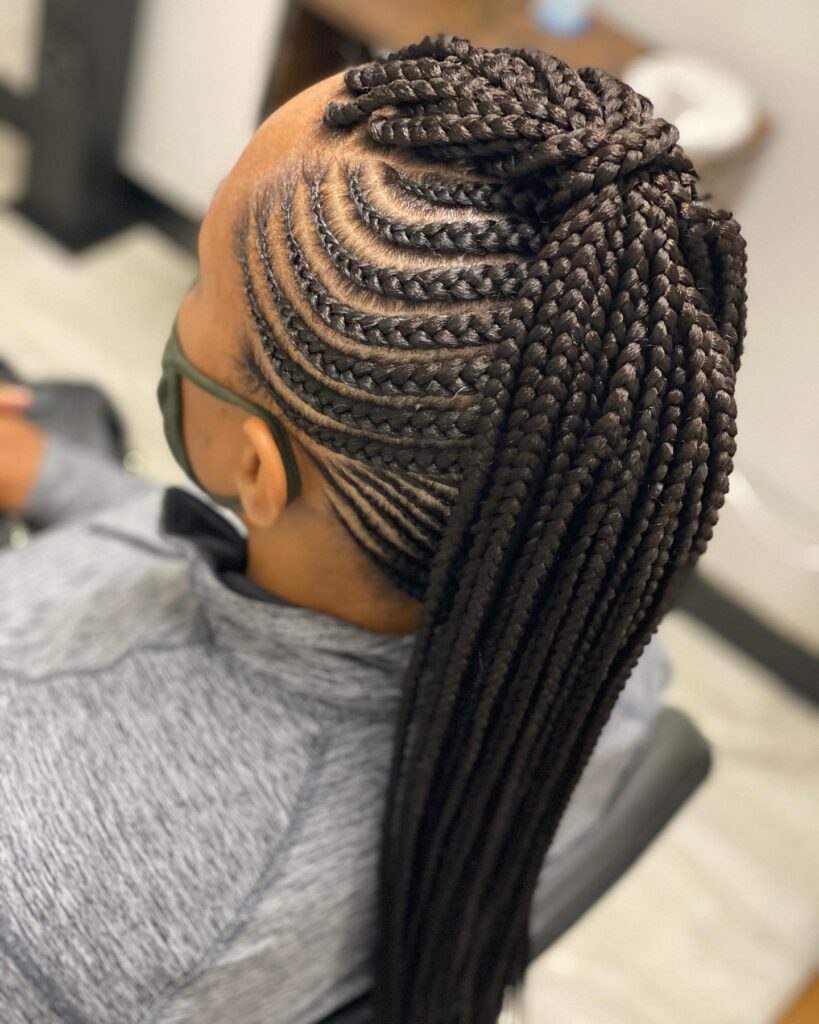
Beyoncé’s lemonade braids — those iconic, side-swept cornrows — inspired a whole generation of protective style enthusiasm. The mohawk variation takes the concept and adds a central raised element: side braids swept dramatically toward a center crest, with the remaining center section lifted into a puff, a twist-out, or more braids. The diagonal direction of the side braids gives this style incredible movement and energy, and it frames the face in a way that’s uniquely flattering for oval, round, and heart-shaped faces. It’s one of the most photographed braided mohawk variations for good reason — it looks extraordinary from every angle.
Best for: Oval, round, and heart-shaped faces
Lasts: 3–5 weeks
Tip: Part the front hairline cleanly before installation — a sharp, defined part at the forehead elevates this style significantly
12. Braided Mohawk with Crochet Hair
Source: @Instagram
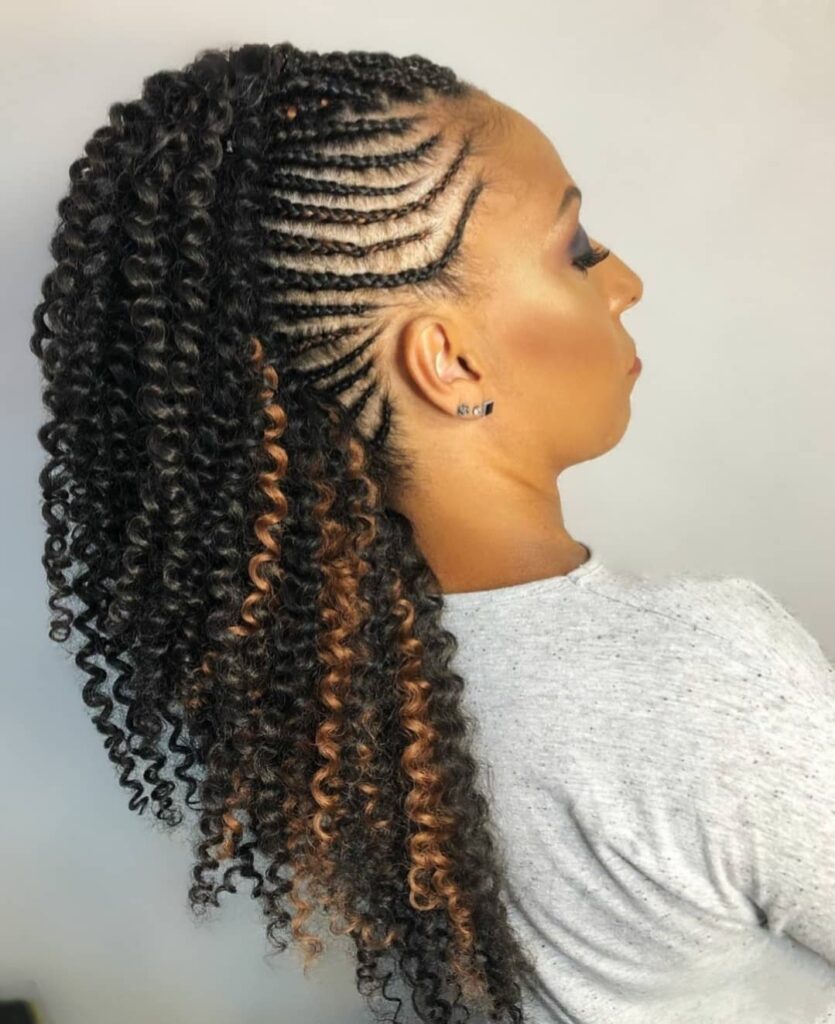
Crochet braids open up a world of texture possibilities for the mohawk center section. The sides are cornrowed flat (these cornrows also serve as the base for crochet attachment), and then crochet hair — in any texture from Marley twists to Senegalese twists to kinky curly — is looped through the center cornrows to create volume and height. The crochet technique makes installation faster and gentler than traditional braiding extensions. You can switch up the texture of the crochet hair to completely change the look: go for springy curls one month and loose waves the next. Extremely versatile and one of the most popular technique combinations in protective styling right now.
Best for: All face shapes, type 3A–4C hair
Lasts: 4–6 weeks
Tip: Install the crochet section last after the cornrow base is complete, and use a latch hook tool for cleaner, tighter attachment
13. Color Highlighted Braided Mohawk
Source: @Instagram
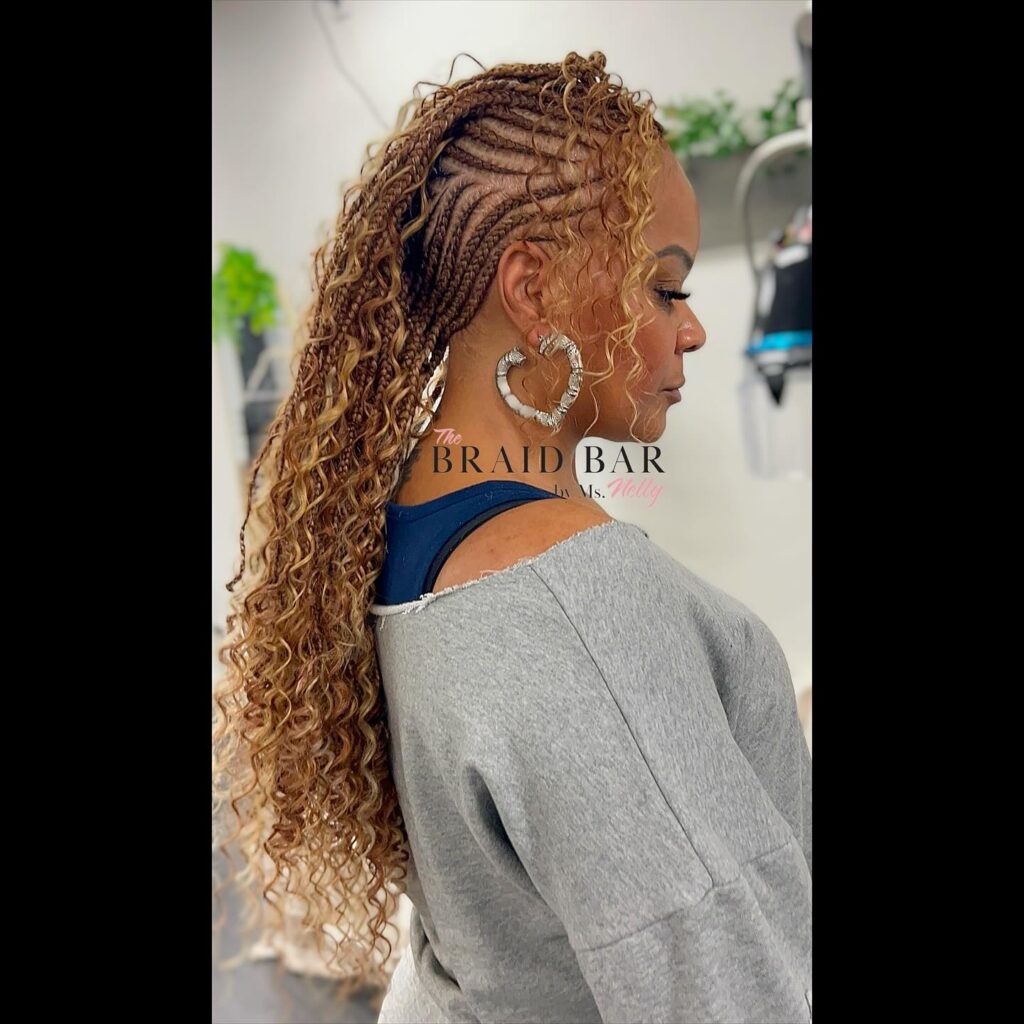
Adding color to your braided mohawk is one of the easiest ways to personalize the style. You don’t have to dye your natural hair — simply choose extension hair that includes highlights, ombre color, or a bold solid tone. Honey blonde, burgundy, auburn, and copper all look incredible against deeper skin tones. For a more subtle take, add a few highlights threaded through the center braids while keeping the side cornrows in your natural color. A fully colored center strip against dark sides creates a dramatic two-tone effect that’s bold, modern, and completely protective. It’s the best of both worlds — color without the commitment or damage of chemical processing.
Best for: All face shapes and hair types
Lasts: As long as the braids
Tip: Burgundy and auburn tones are particularly stunning on deeper skin tones and hold their visual richness longer than lighter blondes
14. Mini Cornrow Mohawk
Source: @Instagram
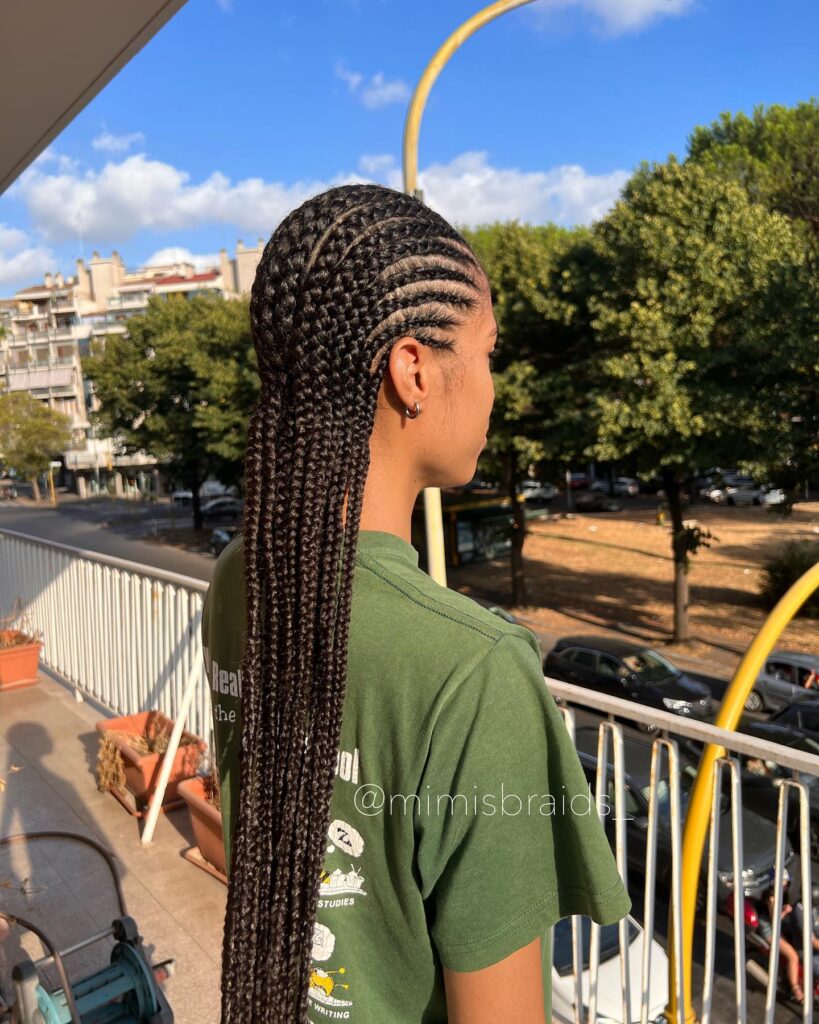
Smaller doesn’t mean less impact — in fact, micro or mini cornrows on the sides of a mohawk give the style an almost architectural level of detail that large braids simply can’t achieve. Each tiny cornrow running toward the center is a small work of art, and when you zoom out, the cumulative effect is stunning. The center section can be left natural, twisted, or topped with a small puff. This style is extremely popular for children but looks incredibly sophisticated on adults, especially when the center section is styled with precision. Note that mini cornrows take significantly longer to install — expect 3–5 hours — but the result is worth every minute.
Best for: All face shapes; especially flattering on rounder faces
Lasts: 4–6 weeks
Tip: Keep edges laid and clean with a light edge control — mini cornrows make any hairline imperfection more visible, so clean edges are critical
15. Braided Mohawk Updo
Source: @Instagram
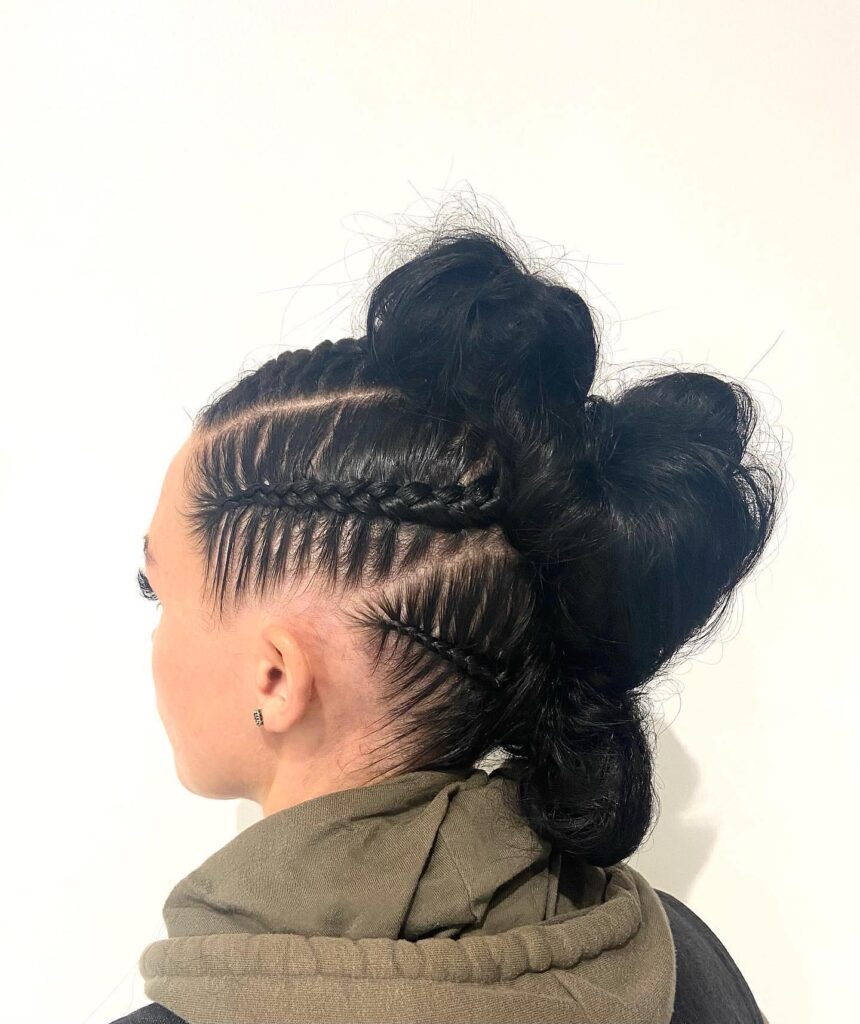
This variation transforms the mohawk into a fully upswept style. Instead of allowing the center section to stand up or hang loose, all the braids are gathered and styled upward and back — either into a high bun, a cascading updo, or a sculptural knot. The braided mohawk updo is the most formal variation on this list, making it ideal for weddings, proms, galas, and corporate events where you want a protective style that still reads as polished and formal. Side cornrows sweep elegantly toward the center, and the upswept top section adds impressive height. Accessorize with jeweled pins or a floral crown for occasion styling.
Best for: Heart, oval, and oblong face shapes
Lasts: 3–5 weeks
Tip: Have your braider leave the final 6–8 inches of the center braids free so they can be shaped into the updo on the day of your event
16. Zig Zag Part Braided Mohawk
Source: @Instagram
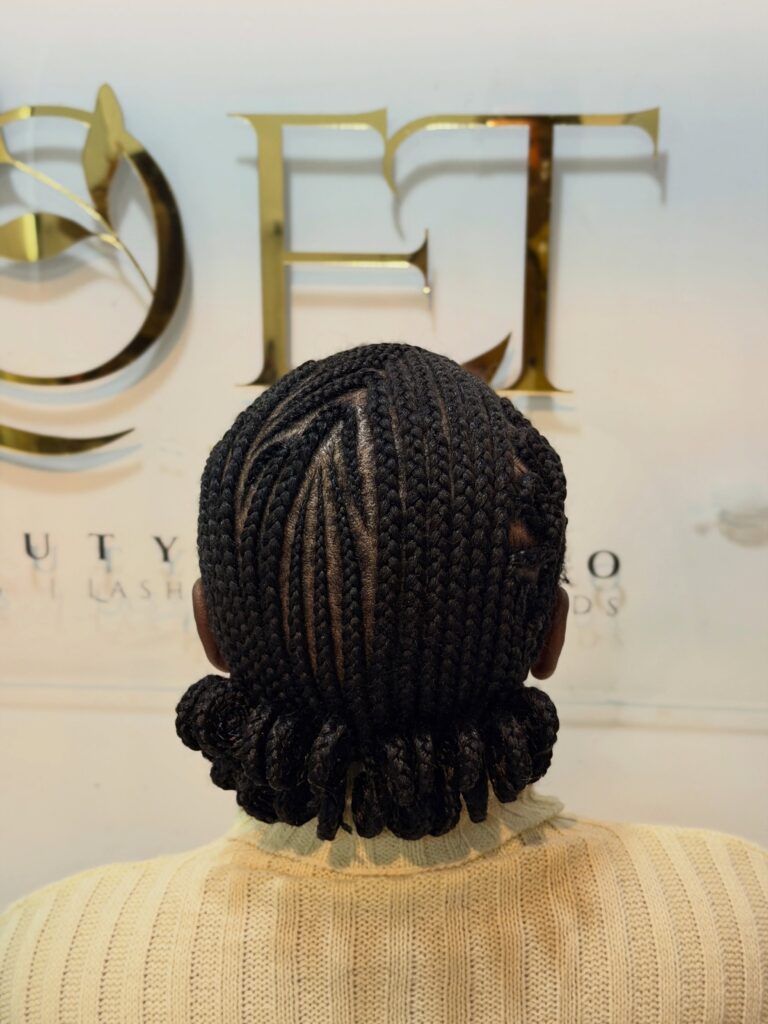
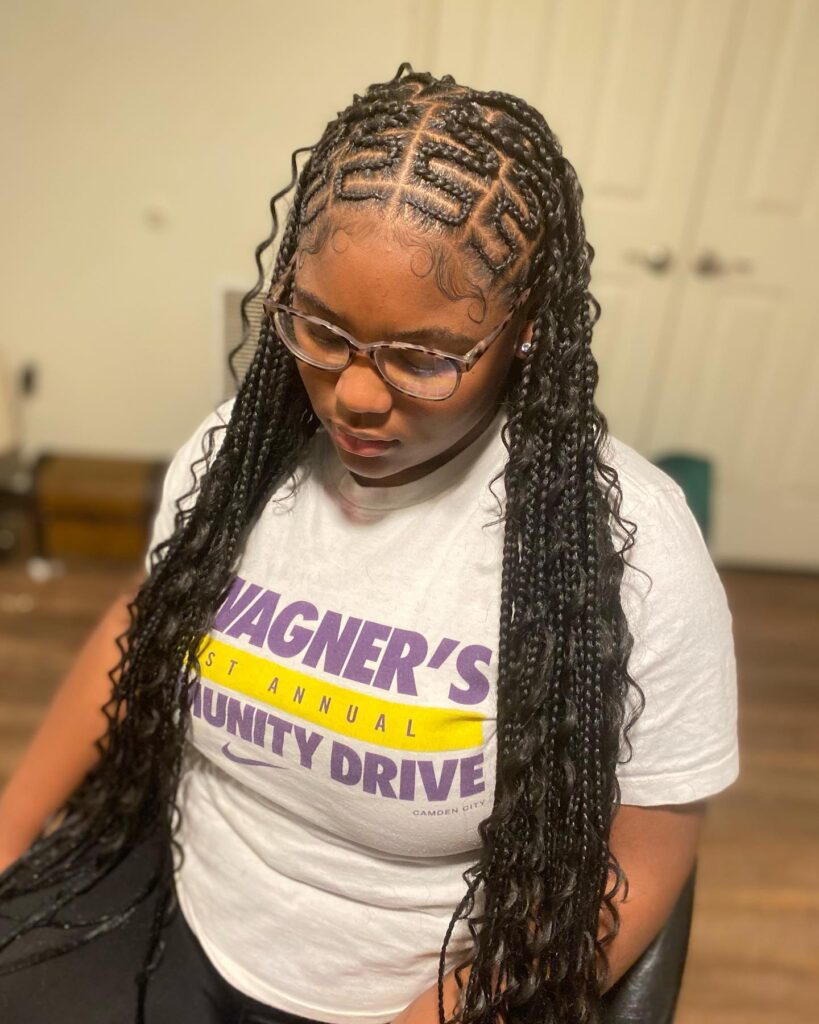
The part is the secret weapon here. Instead of a straight center part dividing the side cornrows from the center, a zig-zag or curved part line adds a completely unexpected level of detail and visual interest. The alternating diagonal sections created by the zig-zag part make the side cornrows appear more complex and dynamic, even when the braid pattern itself is simple. Paired with a curly or puff center, the zig-zag part braided mohawk looks genuinely custom and unlike anything you’d find in a basic style guide. It’s a small detail that makes an enormous difference. Many braiders charge a small additional fee for the extra time required to create the part precisely — it’s worth it.
Best for: All face shapes; especially great for oblong faces as the horizontal visual breaks the length
Lasts: 3–5 weeks
Tip: Use a rat-tail comb and a bright light to create the zig-zag part before beginning installation
16 Braided Mohawk Styles: Full Comparison Table
| # | Style | Hair Type | Install Time | Lasts | Skill Level | Best Occasion |
|---|---|---|---|---|---|---|
| 1 | Classic Cornrow Mohawk | All types | 1–2 hrs | 2–4 weeks | Beginner | Everyday/ Casual |
| 2 | Feed In Cornrow Mohawk | Fine/sensitive | 2–3 hrs | 3–5 weeks | Intermediate | Everyday/Work |
| 3 | Faux Hawk with Box Braids | All types | 3–5 hrs | 4–6 weeks | Intermediate | Casual/ Special |
| 4 | Knotless Braid Mohawk | Sensitive scalp | 3–5 hrs | 4–6 weeks | Intermediate | Everyday |
| 5 | Curly Fro- Hawk | 4A–4C | 1–2 hrs | 2–3 weeks | Beginner | Casual/ Everyday |
| 6 | Mohawk with Shaved Sides | All types | 2–3 hrs | 4–6 weeks | Advanced | Bold/ Special |
| 7 | Twist Out Mohawk | 3C–4C Natural | 1–2 hrs | 1–2 weeks | Beginner | Everyday |
| 8 | Goddess Braid Mohawk | All types | 1–2 hrs | 3–4 weeks | Intermediate | Formal/ Special |
| 9 | Braided Mohawk with Beads | All types | 2–4 hrs | 3–5 weeks | Intermediate | All occasions |
| 10 | Jumbo Braid Mohawk | All types | Under 1 hr | 2–3 weeks | Beginner | Events/ Special |
| 11 | Lemonade Inspired Mohawk | All types | 2–4 hrs | 3–5 weeks | Intermediate | Everyday/ Special |
| 12 | Crochet Mohawk | All types | 2–3 hrs | 4–6 weeks | Intermediate | Everyday |
| 13 | Color Highlighted Mohawk | All types | 2–5 hrs | 3–5 weeks | Intermediate | Casual/ Bold |
| 14 | Mini Cornrow Mohawk | All types | 3–5 hrs | 4–6 weeks | Advanced | Everyday/Work |
| 15 | Braided Mohawk Updo | All types | 2–4 hrs | 3–5 weeks | Intermediate | Formal/ Events |
| 16 | Zig Zag Part Mohawk | All types | 2–4 hrs | 3–5 weeks | Intermediate | Casual/ Bold |
Products Every Braided Mohawk Wearer Needs
| Product Type | Purpose | Budget Pick | Premium Pick |
|---|---|---|---|
| Scalp Oil | Moisturizes scalp between washes | Jamaican Black Castor Oil | Mielle Organics Rosemary Mint Scalp Oil |
| Braid Spray | Hydrates and reduces frizz | African Pride Olive Miracle | Camille Rose Curl Maker |
| Edge Control | Keeps hairline clean and laid | Eco Styler Argan Oil Gel | Crème of Nature Perfect Edges |
| Dry Shampoo | Refreshes scalp between washes | Batiste Original | Ouai Dry Shampoo Foam |
| Mousse/Curl Cream | Defines center natural section | Cantu Coconut Curling Cream | SheaMoisture Coconut Hibiscus |
| Braid Spray with Sheen | Adds shine to finished style | ORS Olive Oil Sheen Spray | CHI Silk Infusion |
Common Mistakes and How to Avoid Them
Mistake 1: Installing Too Tightly
This is the number one cause of traction alopecia in Black women. If your scalp is hurting, pimpling, or the edges feel like they’re being pulled — it’s too tight. Always tell your braider immediately. A style that causes scalp pain during installation will cause lasting damage over time. Loose doesn’t mean sloppy; a skilled braider can create a clean, lasting style without compromising scalp health.
Mistake 2: Skipping the Moisturizing Step Before Installation
Installing braids over dry, brittle hair is a recipe for breakage. The night before your appointment, deep condition, detangle thoroughly, and apply a light oil or leave-in conditioner to your natural hair before adding extension hair. Going into installation with hydrated hair means your strands are more elastic and less prone to snapping under tension.
Mistake 3: Neglecting the Scalp During the Wearing Period
Braids don’t mean your scalp gets a vacation. Apply a lightweight oil or braid spray to the scalp every 2–3 days to prevent dryness, itching, and buildup. Neglected scalps under braids can develop dandruff, folliculitis, or excessive flaking that’s difficult to clear up even after takedown.
Mistake 4: Leaving Braids In Too Long
I know it’s tempting — your braids look great and you want to get every day out of them. But leaving any braided style in longer than 6–8 weeks risks matting, severe breakage at the root, and significant shedding during takedown. The shed hair that accumulates inside the braids over time can lock against your natural hair in a way that’s nearly impossible to detangle without damage.
Mistake 5: Rushing the Takedown
The takedown is just as important as the installation. Use a good detangling conditioner or coconut oil to soften the extension hair before you start removing it. Work section by section, patiently. Pulling or ripping braids out is a guaranteed way to lose length that took months to grow.
Mistake 6: Ignoring the Edges During Wear
The braided sides of a mohawk put real tension on the hairline. Apply a light edge-friendly oil like Jamaican Black Castor Oil to the edges every night. Wrap the hairline with a silk or satin scarf before sleeping to reduce friction. Strong, full edges make every braided mohawk look exponentially better — protect them.
Similar Variations Worth Exploring
- The Braided Mohawk → Faux Locs Mohawk: Replace the center braids with faux loc extensions for a more textured, earthy feel with a similar silhouette.
- Cornrow Mohawk → Bantu Knot Mohawk: Replace the center puff or braid with a row of Bantu knots for a bold, culturally rich alternative.
- Crochet Mohawk → Butterfly Locs Mohawk: Use butterfly locs crochet hair in the center for a distressed, boho aesthetic that’s wildly popular right now.
- Classic Mohawk → Braided Mohawk Ponytail: Gather all the center braids into a high ponytail or bun for an upswept variation without a full updo installation.
- Shaved Side Mohawk → Undercut Braid Design: Instead of a full shave, ask your barber for a short undercut with a shaved design that complements the braid pattern above.
- Mini Cornrow Mohawk → Stitch Braid Mohawk: Ask for stitch braids — cornrows created with horizontal partings that create a graphic, stitched pattern across the scalp on the sides.
Hair Care Tips for Braided Mohawk Hairstyles
Pre-Installation: Set Your Hair Up for Success Wash and deep condition your hair 1–2 days before installation. Avoid applying heavy products the morning of your appointment — braiders work best on clean, product-free hair. Make sure your hair is fully dry before braiding begins, since braiding damp hair increases the risk of mildew buildup under extensions.
During the Wearing Period: Hydrate, Protect, Repeat Apply a scalp oil or braid spray every 2–3 days, focusing on the part lines and the edges. Sleep with a satin bonnet or on a silk pillowcase every night — this single habit dramatically extends the life of your braids and prevents frizzing of both the braids and the center natural section. Keep the center natural section moisturized with a light leave-in conditioner.
Washing Your Braids Yes, you can (and should) wash your braids while wearing them. Dilute a clarifying shampoo with water, apply it to the scalp only using an applicator bottle, then rinse thoroughly. Follow with a light conditioner on the length of the braids. Allow to air dry completely before going to sleep — sleeping with wet or damp braids encourages mildew and an unpleasant odor that’s hard to remove.
After Takedown: Recovery Is Everything After removing your braids, resist the urge to immediately install another set. Give your scalp and strands at least 1–2 weeks to breathe, recover, and recover moisture levels. Do a protein treatment within 24 hours of takedown to rebuild any weakened bonds in the hair shaft, followed by a deep moisture treatment 2–3 days later. Trim any split or broken ends before going back in with a new protective style.
Protecting the Mohawk Center Section If your center section uses natural hair, it needs more frequent attention than the braided sides. Apply a curl cream or twist butter every 2–3 days, re-twist if needed at night, and diffuse gently to re-define the curl pattern when it starts to lose definition.
Outro
Braided mohawk hairstyles for black hair are one of the most powerful, versatile, and culturally resonant style categories in protective hairstyling. Whether you’re going full-on shaved sides with a goddess braid crest, keeping it subtle with a feed-in cornrow mohawk, or experimenting with crochet texture in the center, there’s a version of this style built for your hair type, your face shape, and your lifestyle.
The most important things to take away: protect your scalp, hydrate consistently, don’t leave styles in too long, and find a braider you trust. With those fundamentals in place, your braided mohawk hairstyle for black hair will look incredible from install day all the way to takedown.